German Expressionism
German Expressionist films were prevalent during the 1920s. These films were devised by highly stylized visuals, strange asymmetrical camera angles, atmospheric lighting and harsh contrasts between dark and light. Shadows and silhouettes were an important feature of expressionism. The films featured surreal characters however, they usually connected with real stories which made it all the more interesting. The films had a dark, disillusion feel to it, the same words could describe 1940s Hollywood Film Noir, a genre highly influenced by German Expression.
German Expressionism has been influential through out the years and has affected numerous things. I was inspired by this theme of work through previous work such as lighting techniques (chiaroscuro lighting) and Film Noir.
German Expressionism has been influential through out the years and has affected numerous things. I was inspired by this theme of work through previous work such as lighting techniques (chiaroscuro lighting) and Film Noir.
|
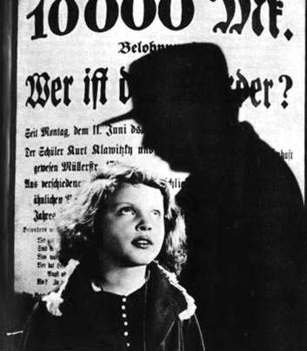
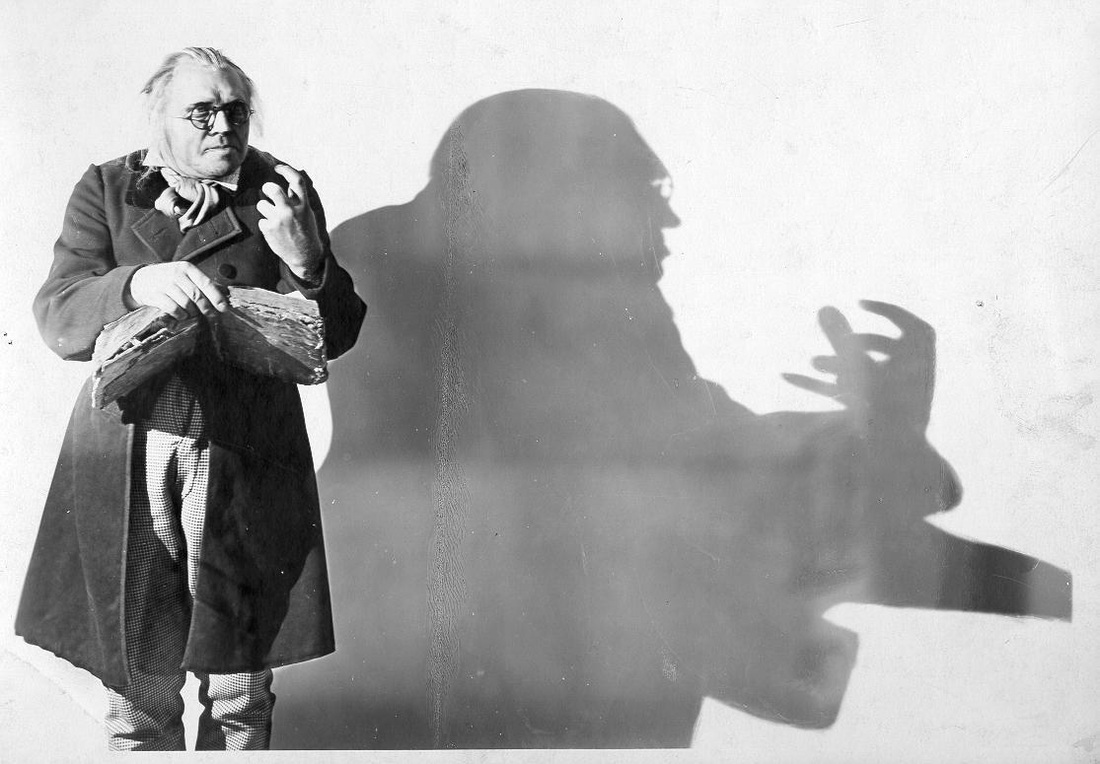
"There's nothing quite like
an immense, black, creeping shadow to indicate an imminent threat: In Fritz Lang's M
(1931), another influential expressionist milestone, the sinister silhouette of child
molester and murderer Peter Lorre looms over his targeted victim -- while partially
obscuring the killer's own "Wanted" poster behind her."
The reason why I chose this photograph is because I believe it looks very effective and this collectively is the inspiration for Film Noir movies as the costume that the man is wearing looks very much like Noir clothing. This photograph is very striking and all the elements within it are bold however, the shadow stand out the most as it is almost like a dark silhouette rather than a shadow. The shadow brings more mystery to the photograph as people are wanting to know what the person looks like but all they know it what the outline of the man is which is almost like a cliff hanger through the use of a photograph. |
|
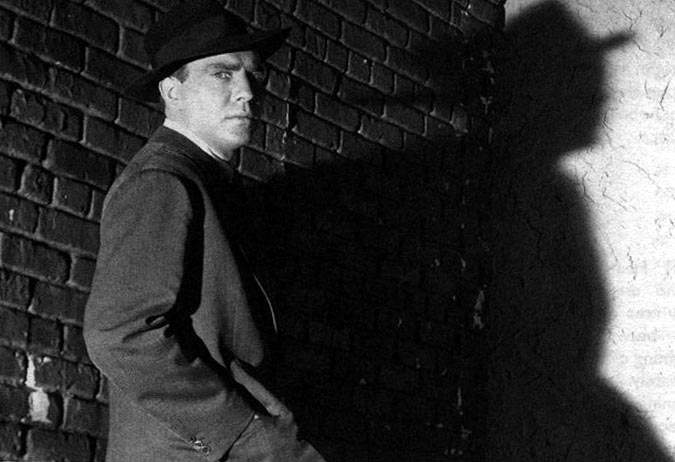
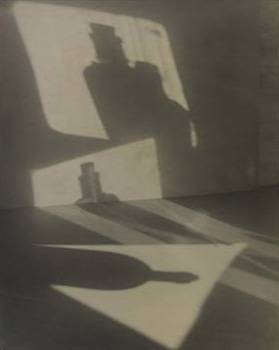
"Like mirrors, shadows can
create what critics Janey Place and Lowell Peterson have called "two-shots of one
character." This one, of Edmond O'Brien in Robert Siodmak's The Killers
(1946), suggests the presence of a darker alter-ego. (For more on this idea, don't
forget to check out the Dark Room mirror...)"
This monochrome photograph is effective because the shadow of the man is distorted behind him and I believe that this gives the photograph more depth. The lighting on the models face is split lighting and this hides half of his face in the dark which overall, creates a sense of mystery and it looks quite sinister. |
|
|
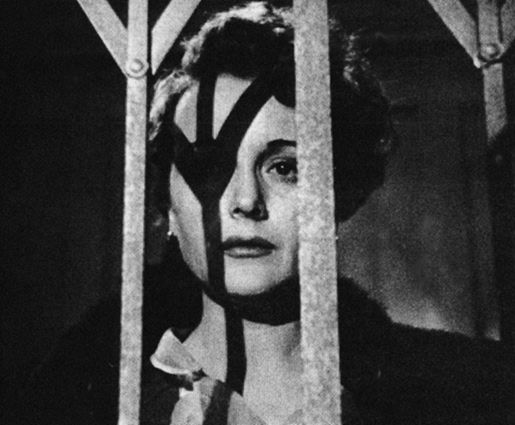
"Talk about crow's
feet! At the end of John Huston's The Maltese Falcon (1941), sometimes
cited as the first true film noir, bad girl Brigid O'Shaunessy (Mary Astor) takes
her place behind bars and is branded with the indelible mark of the black bird, that
elusive treasure fashioned from the stuff of dreams."
This photograph is effective as they have used the shadow to to theit advantage. They used the object which is meant to look like bars but lit it so that it looks like its a crows foot on her face. The main reason why I like this photogtaph is because of the meaning behind it.
|
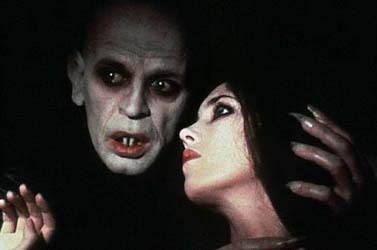
Nosferatu
|
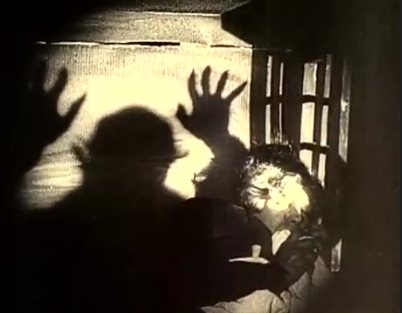
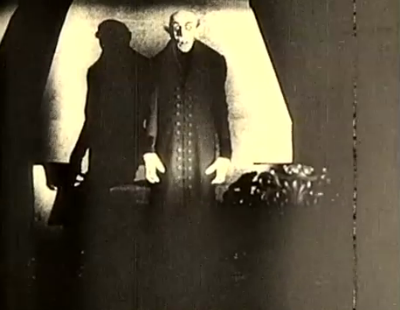
"On the wall behind Fred
MacMurray's head in the Dark Room there appears, as mentioned above, the digitally
distorted spectre of the mysterious Max Schreck, playing the title vampire in German
director F.W. Murnau's still-scary (and hauntingly beautiful) Nosferatu
(1922). Murnau later came to Hollywood and made one of the most stunningly gorgeous
of all American films: Sunrise (1927)."
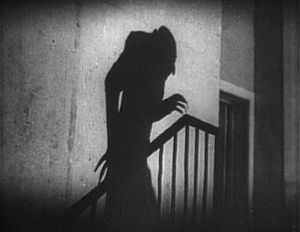
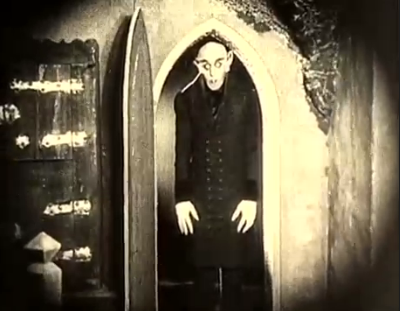
The following photographs of this movie is effective as they use them to manipulate and change the atmosphere of the whole scene. The shadows that have been created add a sense of horror and mystery to them. The photograph on the right shows the actor through a shadow but it is such a distinct shadow that everyone could instantly tell what it is. They have manipulated it and used the lighting to change the proportions of the shadows. They have lit the subject from below which makes the shadow go bigger and this creates a sense of power and superiority.
|
|
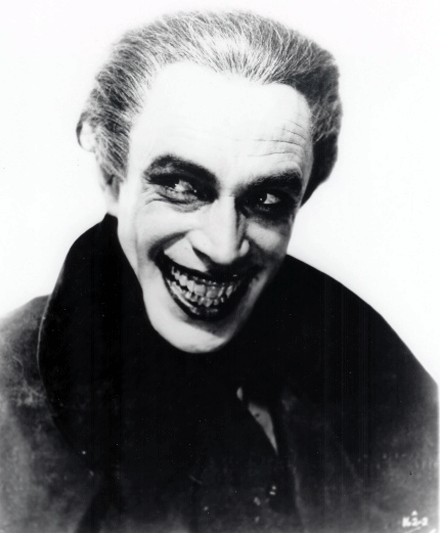
Dr. Cilagari
|
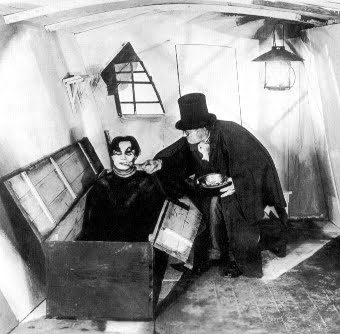
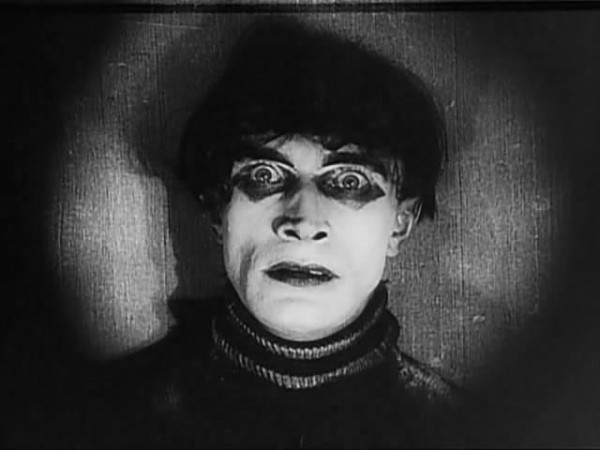
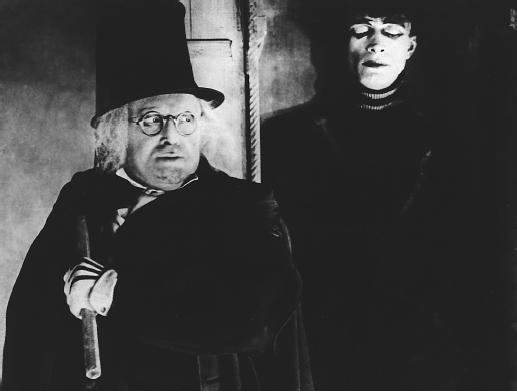
"The first
Expressionist film was The Cabinet of Dr. Caligari (1920), directed by
Robert Wiener. The film was designed by Walter Reimann and Walter
Röhrig. Caligari is about the evil director of an insane asylum who
manipulates a somnambulist (or sleepwalker) into committing murders.
This is Werner Kraus as Caligari and Conrad Veidt as the sleepwalker
Cesare (Veidt later played the Nazi major in Casablanca). The bourgeois
doctor has a top-hat and cane. This can be seen as a criticism of the
privileged upper class who marched the working classes to their deaths
in World War I."
Johnny Depp's inspiration for Edward Scissor-hands was from the classic movie Cabinet Of Dr. Caligari. The reason why I chose to research this movie is because they use light and shadow in various ways. The photograph on the right consists of a shadow that has been manipulated through lighting, the lighting was kept at a certain angle in-front of the subject and this allowed it to create an absurd angle. Another reason why I like this is because the photographs below look very effective. Although, they are all monochrome, they use this to their advantage. I believe that this is effective as they use different styles and perspectives on the photograph. The first photograph below looks as if they have taken it through a fish eye camera lense as it looks three-dimensional as |
|
German Expressionist Make-up Inspiration


The following sheets below are characters that I have designed that I believe represents my perception on German expression and the influence and inspiration I have gained from this. I do not want my characters to look extremely fake but I want to bring the excitement and realism that existed during the time of German Expressionism.
|
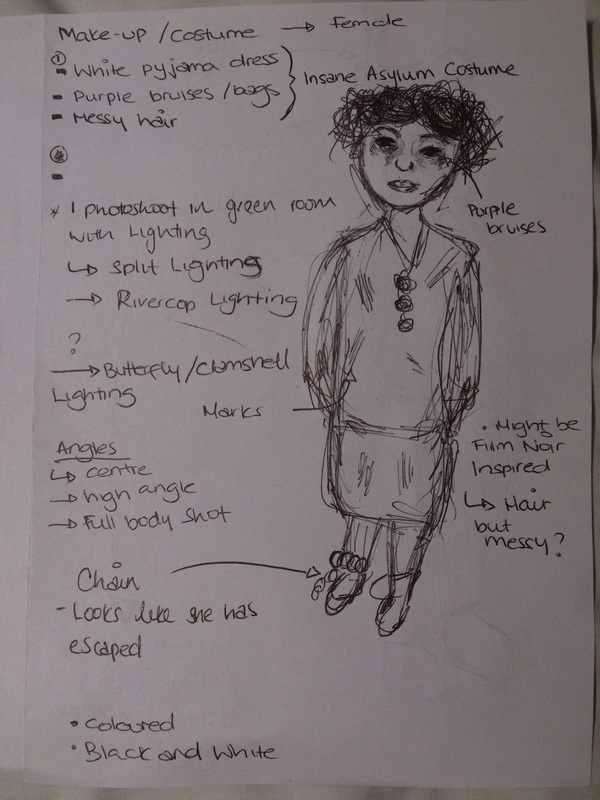
I have drawn a character of an Insane Asylum costume. The clothing that the model will be wearing is a plain cotton seamless dress that drapes with no fitting that looks dirty and rugged as if she just escaped the asylum. I will be attaching a chain to her foot so that it gives the impression that she escape.
|
|
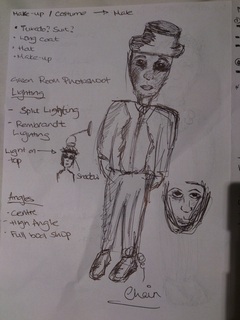
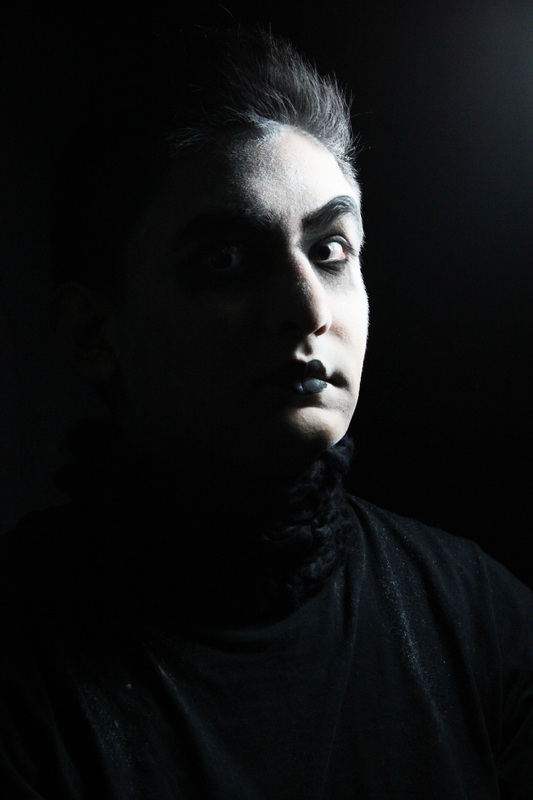
This costume has been inspired by Fritz Lang's movie that. There are shadows in these photographs of men with hats and long coats on and I would like to take the idea of a typical Noir man and turn it in to a nightmare like man. I will be applying make-up on my model giving the impression of a sinister look with dark eyes and possible bruises. He will also have chain around him so that it looks as if has escaped as well. This will be paired with the female model
|
|

|
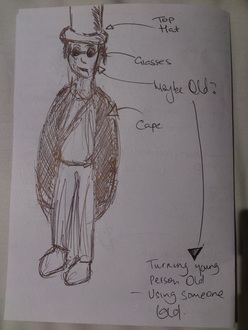
I have taken the inspiration from the movie Dr. Cilagari. I will be taking elements from the original costume but making it my own to show the inspiration I have gained from this. This is how the movie Edward Scissor-hands got inspiration from their costume.
|
|
This costume has been inspired by the movie Dr. Cilagari. I am going to use a female model to make it more versatile and I will also try this with a Male model to make a comparison. This costume will include a top hat and circular glasses. I will also need my model to wear a shirt and a big coat that drapes across their body. I would like the model to look quite old however, if an older model is not available, I will be using
|
|
Jaromir Funke
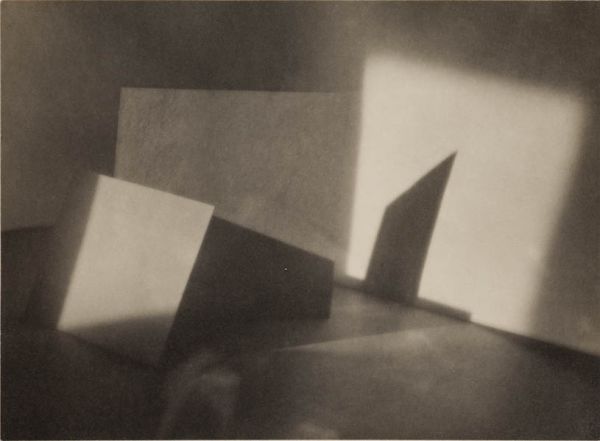
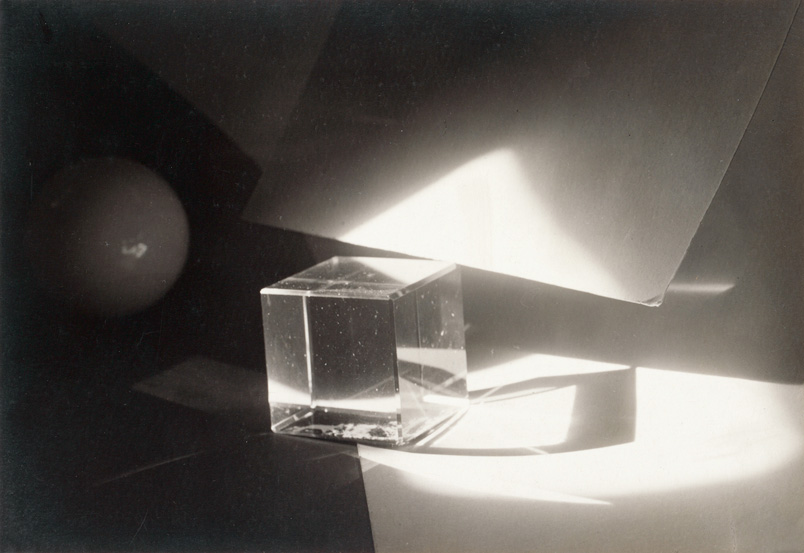
Jaromír Funke (1896–1945) was a Czech photographer. Funke was a leading figure in Czech photography in the 1920s and 30s. In 1924 he, Josef Sudek and Adolf Schneeberger founded the Czech Photographic Society. Funke headed the photography department at the School of Arts and Crafts in Bratislava and was editor of the journal Fotografický obzor (Photographic Horizons) for several years. The reason I chose this photographer is because he works with shadows and manipulating shadows using different lighting and objects. I like the way he uses the lighting to portray a German Expressionism style background with absurd angles and shadows. Although my main focus is portraiture, I decided to research this photographer as this style of photography could be a possibility for backgrounds. I believe that the shadows are achieved though reflections and this looks very effective.
Luca Pierro
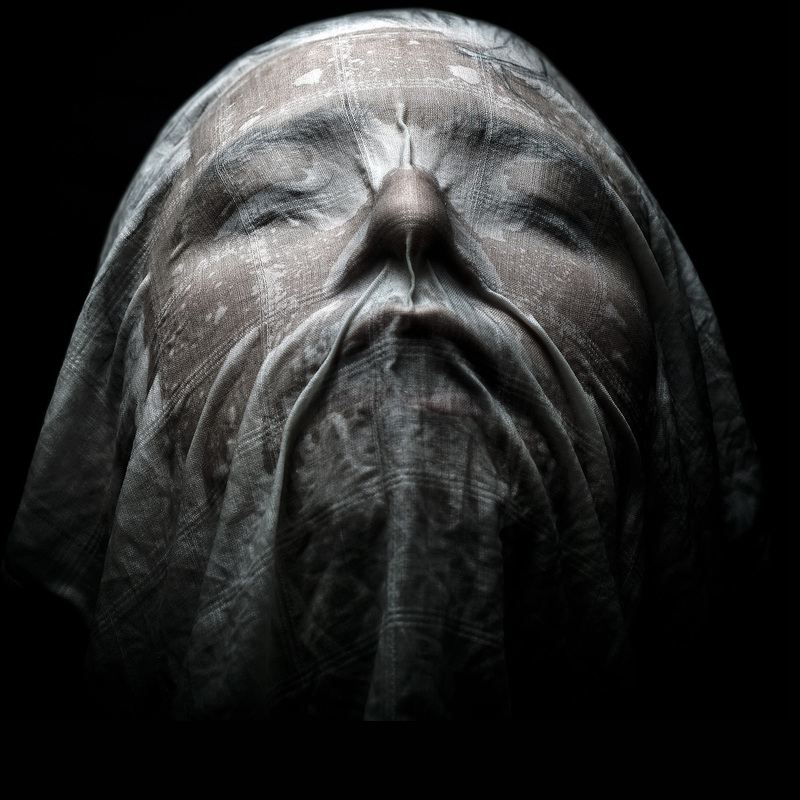
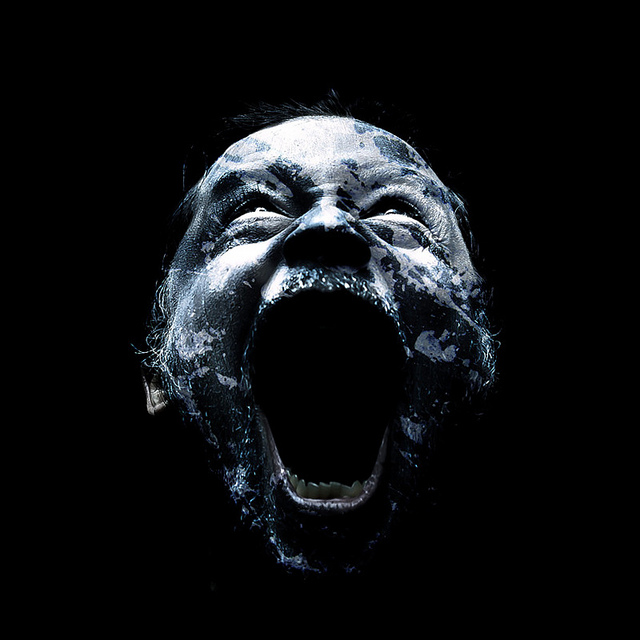
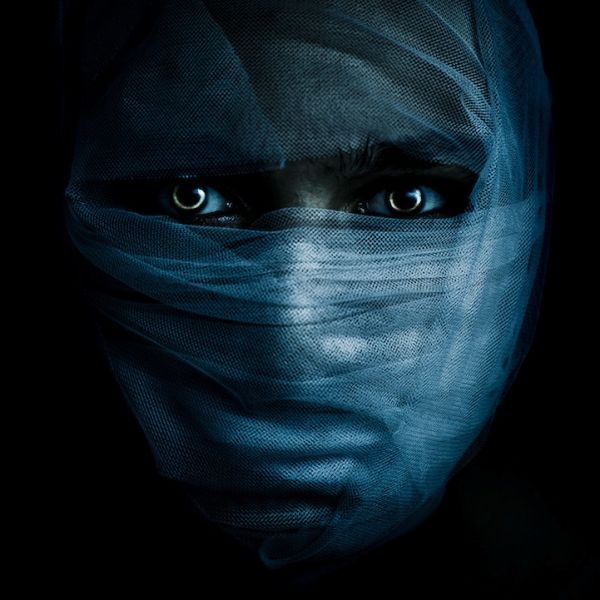
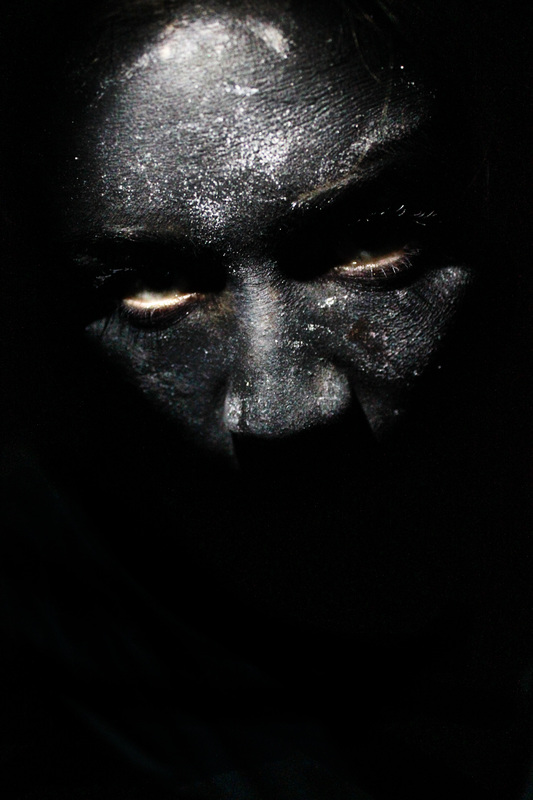
Pierro Taking inspiration from painting and the surrealism in particular, Luca tries to recreate in his portraits ethereal surrealistic atmospheres. The lightning and the use of various natural materials (water, flour, talcum powder, sugar, etc.) become predominant.
I researched this artist as his photography stood out to me. He has his own house style and he uses chiaroscuro lighting to make effective photographs that have a lot of depth within them. This photographer has inspired me to look in to this type of lighting. I believe that these photographs are extremely effective as they are extremely contrasted. The photographs are very expressive which makes them more effective and bold. Initially, when I looked at these photographs, the first thing that I noticed was the obvious comparison through light and shadow.
|
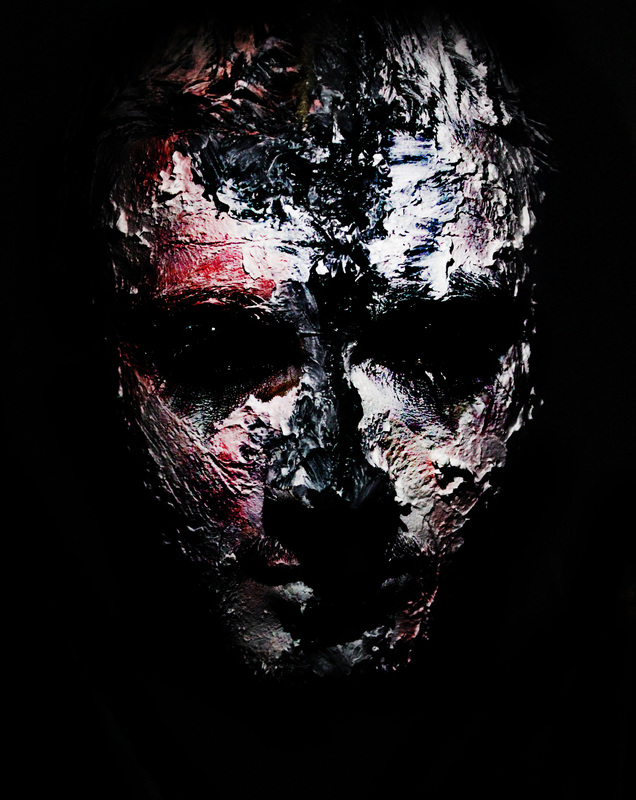
This was inspired by Luca Pierro. I started by applying paint on my models face, I wanted to achieve a textured colour cool and so I ensured that the paint was not applied on smooth. I then used butterfly lighting but placed it quite close to the models face so that it looks harsh against the face. I then manipulated the photograph on Photoshop to enhance it. I used the burn tool on the highest opacity and then I burned the eyes so that they look completely black, I then burned around the face just like Pierro. I believe that this looks effective as the photograph looks very in-depth due to the texture and it draws your attention.
|
|
|
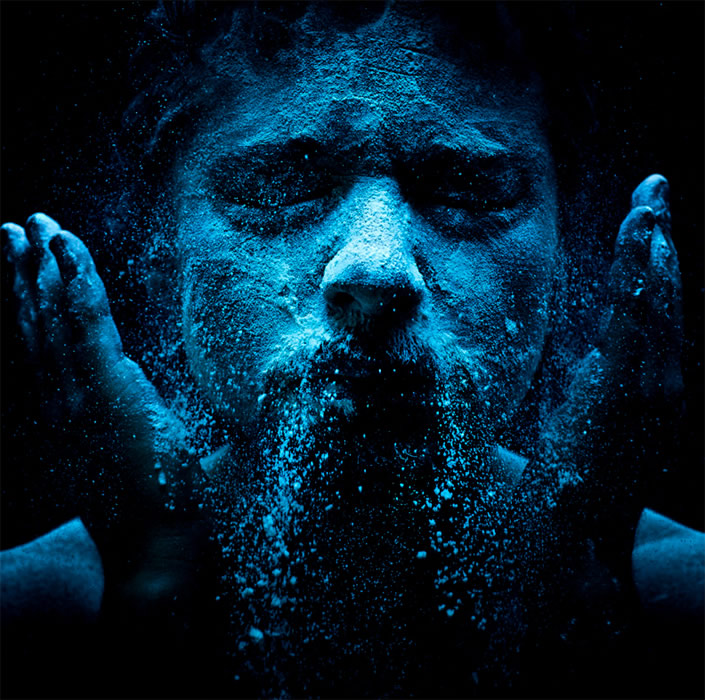
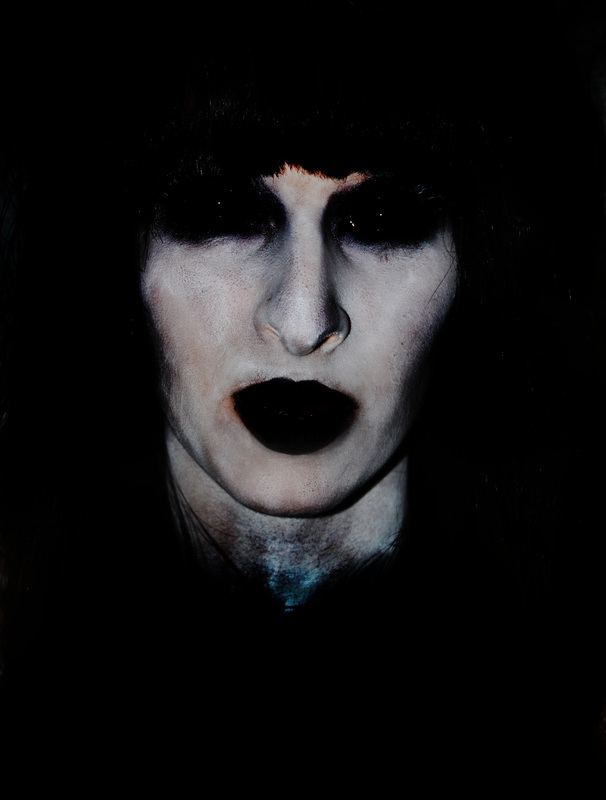
This photograph was also inspired by Pierro. On the raw photograph, I used butterfly lighting also but I kept it further away as I wanted it to look more flattering. I applied white paint all over my models face and hair and the original had a smooth texture, the reason why I left it smooth is because I wanted to test my Photoshop skills to see whether it was possible to add texture through manipulation. I used the burn tool on Photoshop to completely darken the background and I then moved on to her face, I burned her eyes so that you can't see what apart from the white dots which was the lighting on her eyes, I left that as I felt it make it looks more effective. This photograph looks very sinister and alien like which is what I was attempting to achieve. As I burned the face, I changed the opacity to 50% as I didn't want it to be too harsh against the face, the burn tool started to create an imbalance of colour within her face which led to different colours appearing, this also gave texture therefore, I didn't use any other tool as I felt that this worked best.
|
|
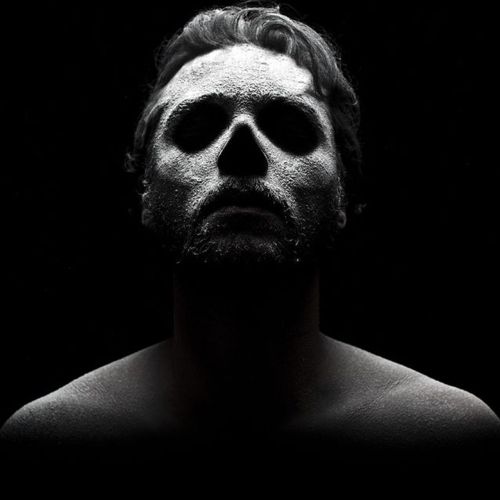
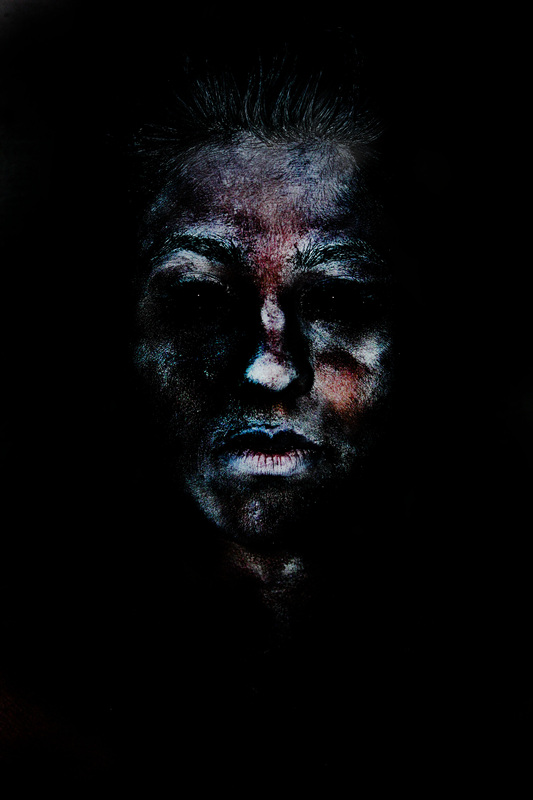
This photograph was also inspired by Luca Pierro, my intention for this photograph was to get the composition correct and achieve a similar facial structure. I used the same tool as I did with the previous ones, this tool is the burn tool. I believe that this tool helps me to achieve the style that I want. I burned the background black to draw all the attention to the models face, I then used it on her face to get rid of her eyes. I believe that this photograph is effective as it looks very eerie and sinister.
|
|
Experimentation
The costume in this photo-shoot has been inspired by the movie Edward Scissors-hand and a German expression movie called Dr. Cilargari. My intentions for this shoot were to portray a costume that I feel represents German Expression but also to show different lighting that could be used to create this type of atmosphere and various angles that could also be used. German Expressionists used absurd angles and I feel that the angles that I had used in my photo-shoots were standard photography rules and I didn't step out of my comfort zone.
Photoshop Experimentation
|
|
I used photo-shop to manipulate the face of my model as I wanted to make it look more sinister and I tried to liquify the face and change the facial features of the model so that it gives the impression that this model is something that would exist in a German Expressionist movie. I slimmed the face so that it looks elongated and lifted the eyebrow so that the face looks absurd but realistic. I ensured that I didn't move away from the realism of the face. I believe that this photo-shop experiment was successful and I will be using this tool again. I also used the brightness and contrast tool to make the lighting look more harsh and to make the face stand out more against the black background. The lighting used in German Expressionism is quite harsh and consist of many shadows and absurd angles.
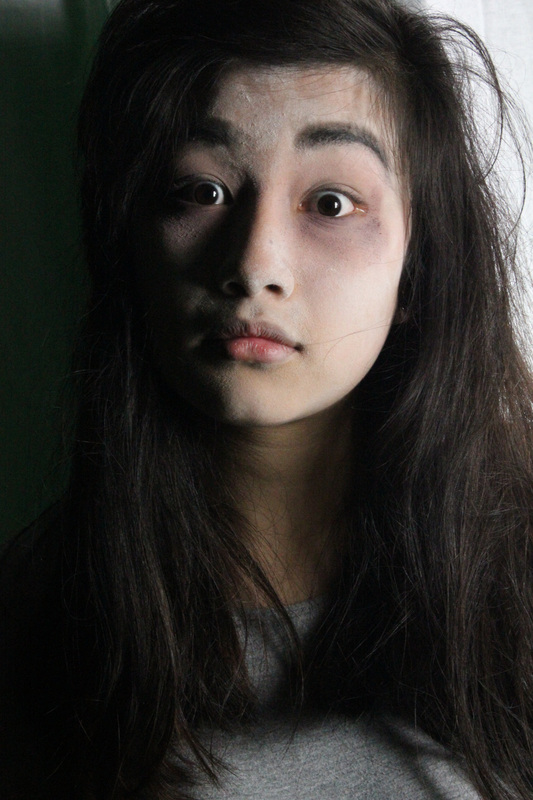
This photo-shoot was my first using a female model. The make-up I used was very minimal and I believe that it didn't look as effective as I wanted it too. The lighting I used is split lighting and Rembrandt lighting, this is because both lighting look mysterious and they also has harsh shadows. I believe that these photographs look flat and this is because of the make-up. This photo-shoot was one of my ideas however, the idea changed as I started taking my photographs. Initially, I was going to take full body shot photographs of my model with a chain around her foot but as I started taking the photographs, I came to the realisation that full face close up shots are much more effective and tell a better story.
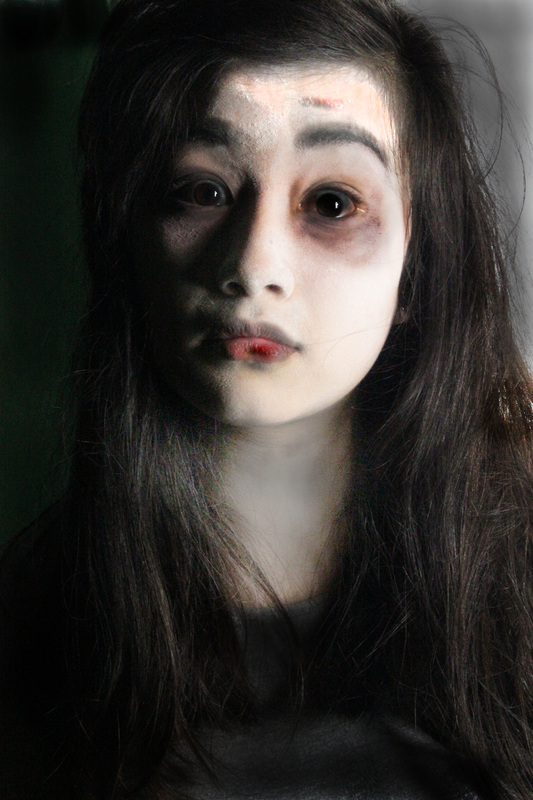
As this photograph look flat, I used photo-shop to add more depth to it and make it more eerie. I used the brightness and contrast tool to exaggerate the lighting and shadows to give it more depth. I then used the burn tool around her eyes so that the make-up stands out more. I believe that the make-up around her eyes make her look bruised after using the burn tool. I then used the dodge tool to create a bigger contrast between it. The burn tool around her eyes create a dark eerie feel. I then used the liquefy setting and the bloat tool for the eyes. This tool made them look bigger. I then used the patch tool to add more marks around her face. I used the bruise under her eye on the forehead and lips, this created stitch like cuts. I then used the burn tool to make it darker. An aspect I would improve about this specific photograph is the background on the photograph, the grey background has various colours within it, therefore, next time I will ensure that it is one bold coloured background. Also, I would improve the hair as it doesn't look effective, I would make it more messy and textured. I also changed the colour of her neck to white so that it looks like its her real skin colour rather than a fake costume.
|
|
The photo-shoot that I had taken with this model was not as successful as I assumed it would be as the make-up didn't look as effective therefore, I took a photograph from the shoot and used photo-shop to manipulate her face. I used the blur tool around her eyes to make it look as if her eyes are bruised and possessed. I used the dodge tool on her face to make her face lighter so that the make-up and scars on her face are contrasting. The original make-up was applied with powder and I believe that this didn't look successful as it looked amateur and quite comical in the sense that she looked as if she was dressed for Halloween. I used the patch tool on her head and dragged it towards her lips as I felt that the scar will look realistic. The lighting that I have used for this specific photograph is split lighting and the reason for this is that it shades out half of her face making it look quite sinister and eerie.
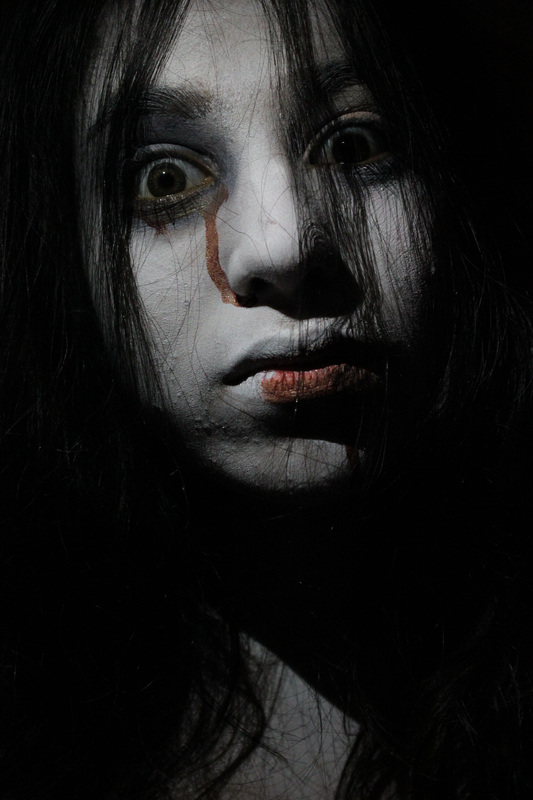
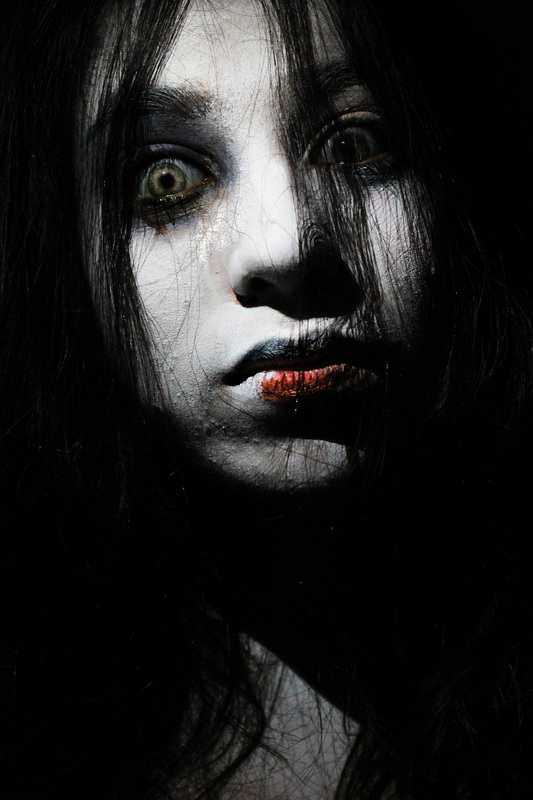
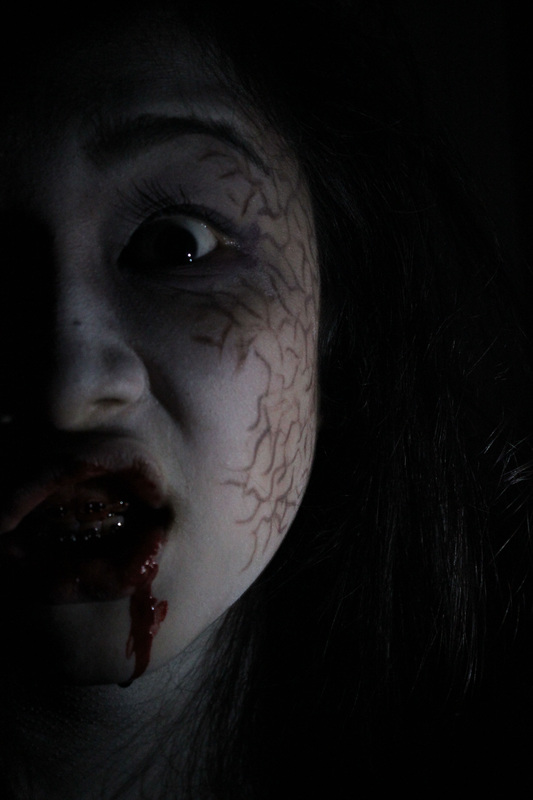
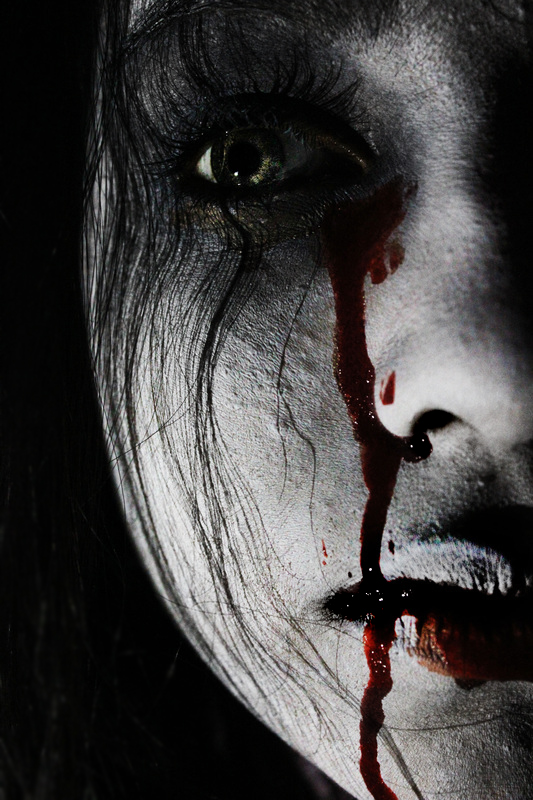
Photo-shoot Experimentation
I did this photo-shoot to test make up, lighting and angles. The make-up that I have done on my model is typical horror make-up which is a white face with dark black circular make-up around the eyes and blood. I experimented with the different angles and to see what would look most effective. I then looked at lighting such as chiaroscuro lighting and split lighting as I wanted to explore what would work well with this eerie feel. I wanted a lighting that was not as flattering such as butterfly lighting. One thing I could improve on is the make-up again as the red blood dried up and looked fake. I used different compositions and angles as I have used inspiration from the German Expressionism film era. I then tried to in-cooperate shadows within the photographs, these photographs were successful however, I believe they were not as effective as I had wanted as the shadows were extremely difficult to create. The main shadow that I had created was using an unflattering light source from the bottom which created a large shadow above her nose, this lighting is good because it is unflattering and eerie however, I want my photographs to look quite flattering. Another thing that I can improve on is the lighting. In the majority of the photographs, the face is lit everywhere.
Photoshop Experimentation

|
|
I used Photoshop to change the brightness and contrast of the photograph to steer it towards the type of lighting that existed during German Expressionism as they had photographs that were high in contrast which was obvious been the light and dark. I then used the dodge tool to lighten her eye and then the burn tool to make the outline of the eye darker so that it is more bold and stands out. The reason why I like this photograph is because it makes you look twice at it when you realise that there is another person present but it is the same person and this was achieved through a mirror effect.
|
|
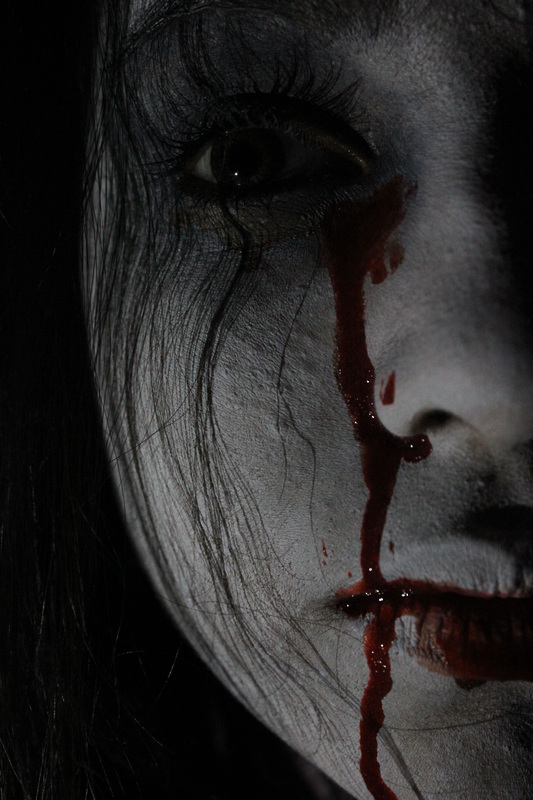
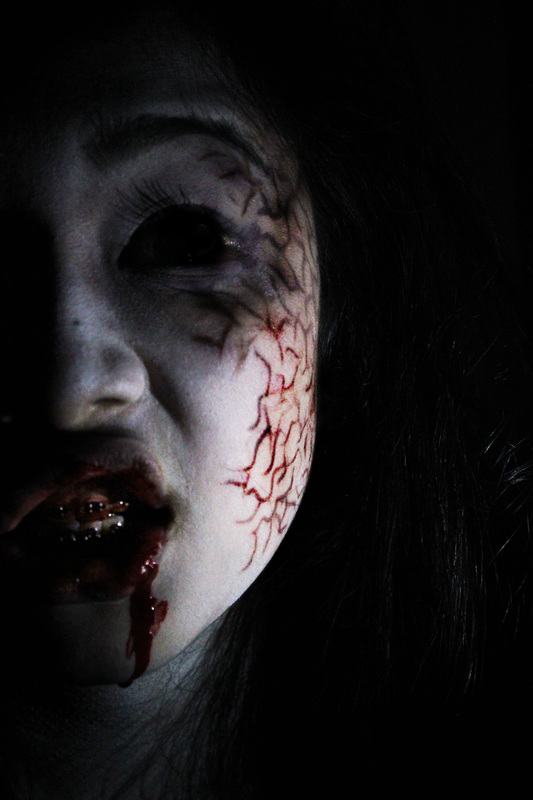
I used Photoshop to manipulate this photograph very slightly. I changed the brightness and contrast to bring more emphasis to her face. I then used the dodge tool to lighten the colour of her eye as my model is wearing a coloured contact lense. This technique allowed me to exaggerate her eye colour therefore, making it almost the center of attention as you are instantly drawn to looking at her eye. I used the patch tool to remove the blood down her face as it looks extremely fake due to the fact that it dried up. I believe that removing the blood made it look more realistic and the horror feel to it.
|
|
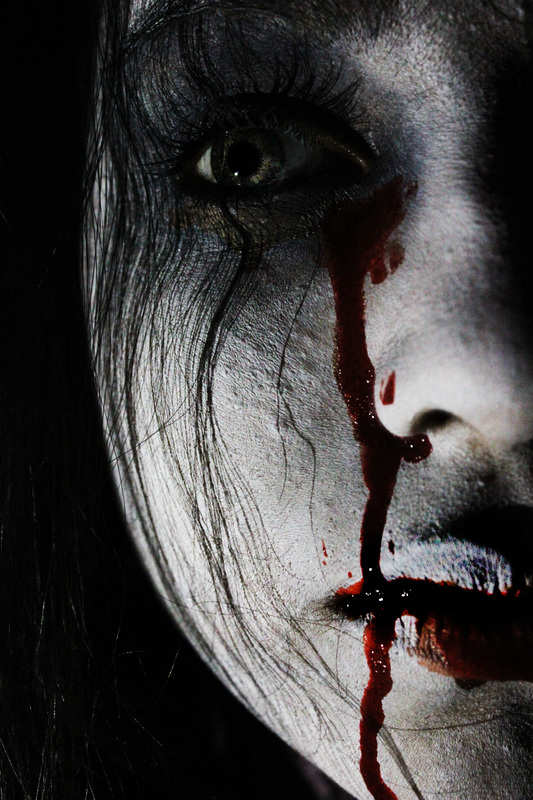
I used Photoshop to change the brightness and contrast of this photograph as I wanted to add more depth to the photograph and I wanted my models face to be emphasized. Before I changed the contrast, it looks quite dark and sinister however, I feel that changing the has led to the photograph looking more alive and as if it's 3D. The contrast also made the blood stand out more which made it look more realistic. I then used the dodge tool to brighten the eyes of my model so that you can see the contact lense but I did it subtly so that it is very faint but noticeable. I have taken a close up shot of half the face as I feel that this brings it alive and it is more effective as it creates an atmosphere.
Photo-shoot Experimentation two.
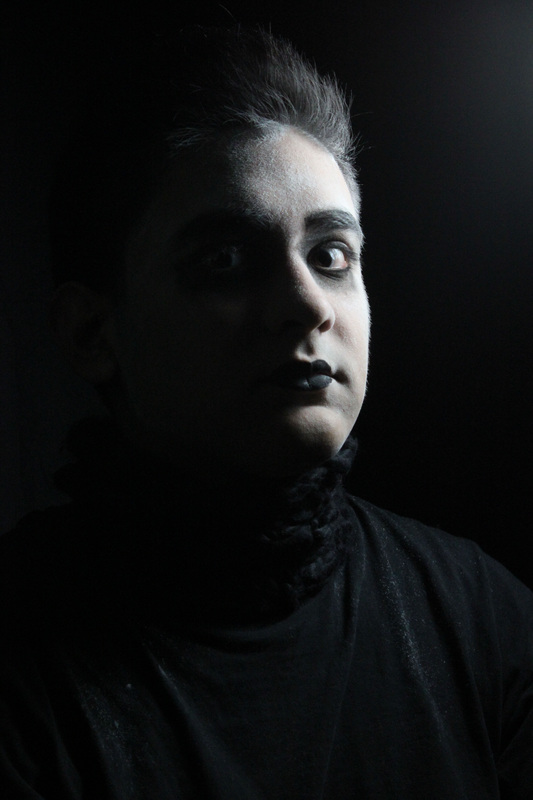
In this photo-shoot, I attempted to keep it as subtle as possible however, I feel as if the white makeup that I assumed would look subtle and eerie made the model look quite fake but the lighting almost defeated that and made it look as subtle as possible. I used chiaroscuro lighting and split lighting as I feel that these types of lighting are dark and sinister and this is the look I wanted to go for. I changed the makeup and the model from the previous shoot as I wanted to recognize the versatility and to see whether it looked more effective. I believe that the photographs are most certainly horrific and this is what I was aiming for therefore, it was successful in that sense. I used different composition styles such as rule of thirds as I wanted to see a variation to see what would look more effective. I feel as if the photographs that have the model really close to the camera are effective as it gives it more depth and makes it look as if it is coming out of the photo.
|
|
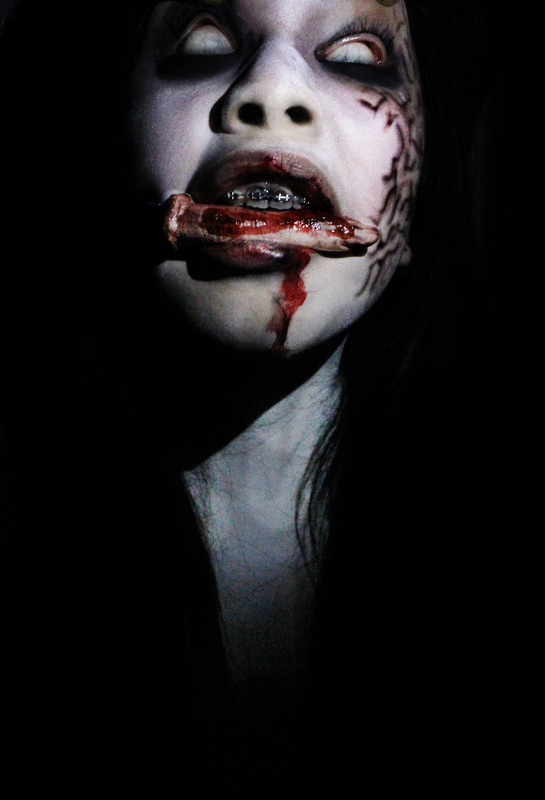
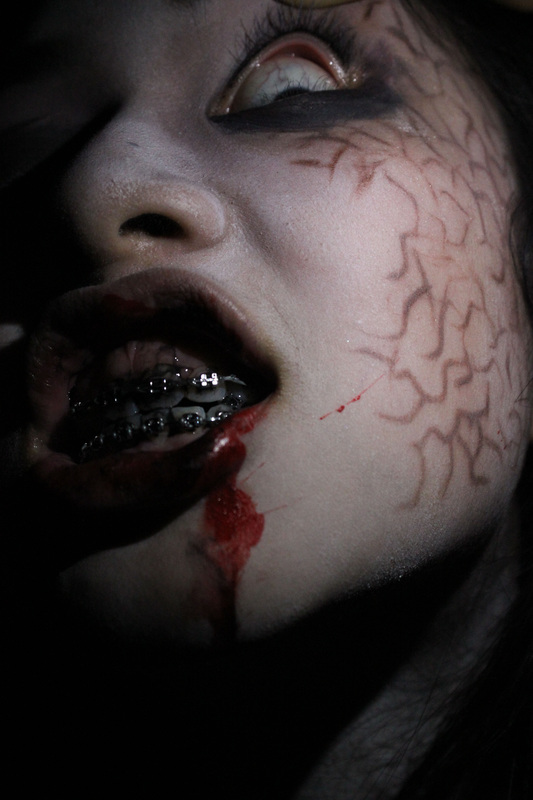
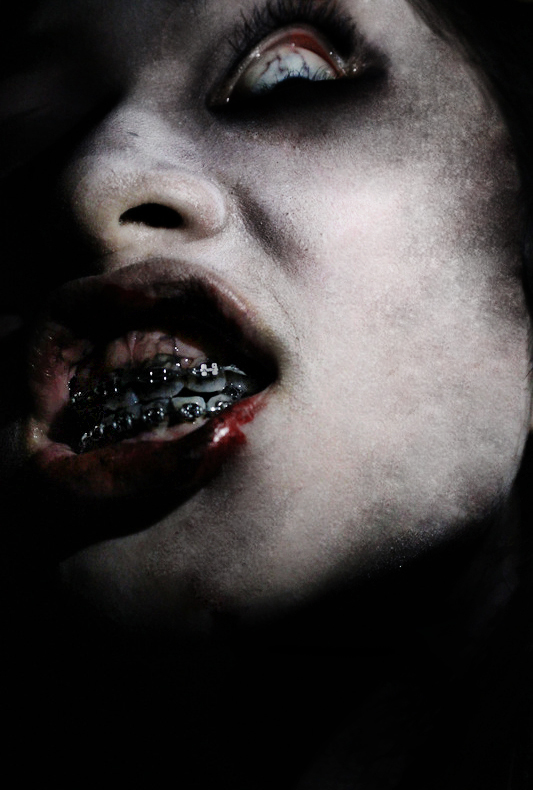
I Photoshopped this photograph to manipulate it by enhancing the features allowing it to look more three dimensional and realistic. I changed the brightness and contrast so that the model isn't hidden behind darkness. I then used the different settings in the burn tool to change the eyes and make them completely black. I then used the dodge tool to bring out the scars to make them look realistic. I then dodged the teeth to make it brighter so that it is more obvious. I like the fact that the scars look realistic however, I feel as if it takes away from the main focal point which was the torturing braces.
|
|
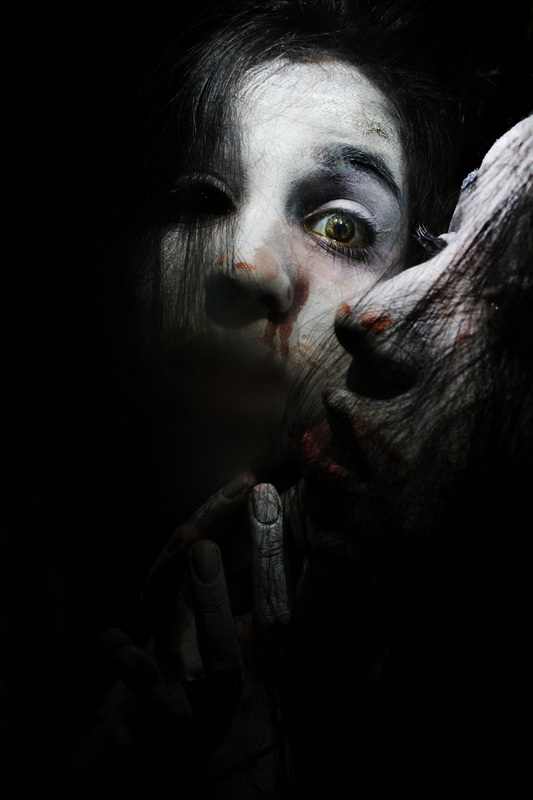
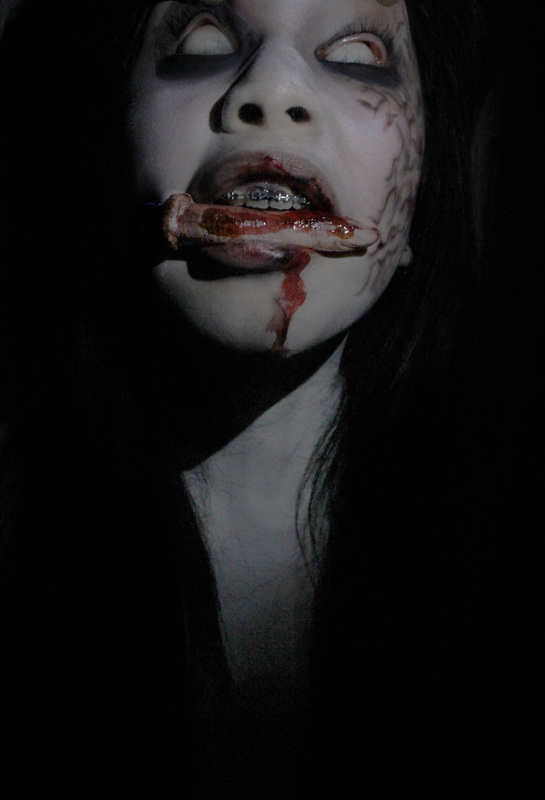
This photograph was improved and manipulated through Photoshop. I changed the brightness and contrast of the photograph to make it stand out and to exaggerate the face by ensuring that it is the focal point. I then burned the face to make the scars look real however, I feel that they still look fake. I had the model bite a fake finger to expand on the creepy feel, this allowed it to look eerie and scary.
|
|
I felt as if the the marks and scars that I drew on the models face distracted the audiences attention so I used the patch tool to remove the scars which made the skin look textured and rough. The composition of this photograph was a close-up as I wanted to emphasize her face being tortured. The mouth was filled with fake blood and black paint, I ensured that this was positioned closer to the camera as I wanted it to be the focal point. I wanted the audience to notice her pain and the torture caused by the braces. Braces is a component that is meant to help you however, I have used this to my advantage and used it as a tool for torture.
|
|
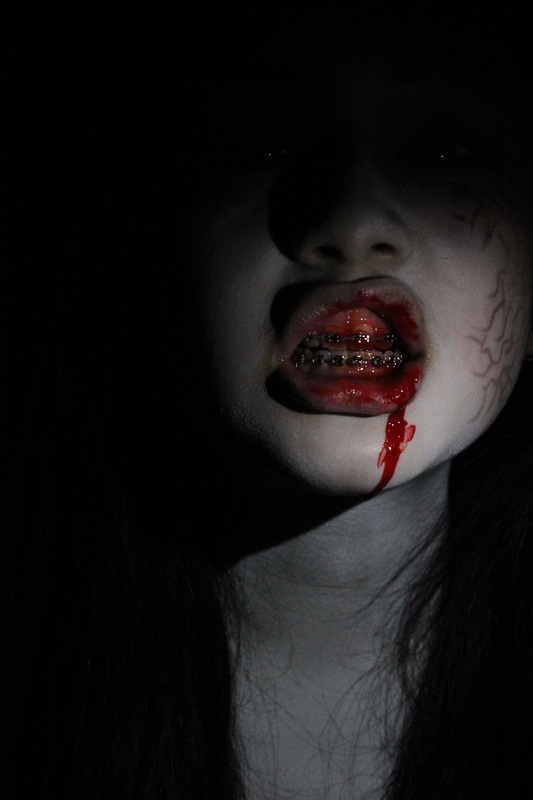
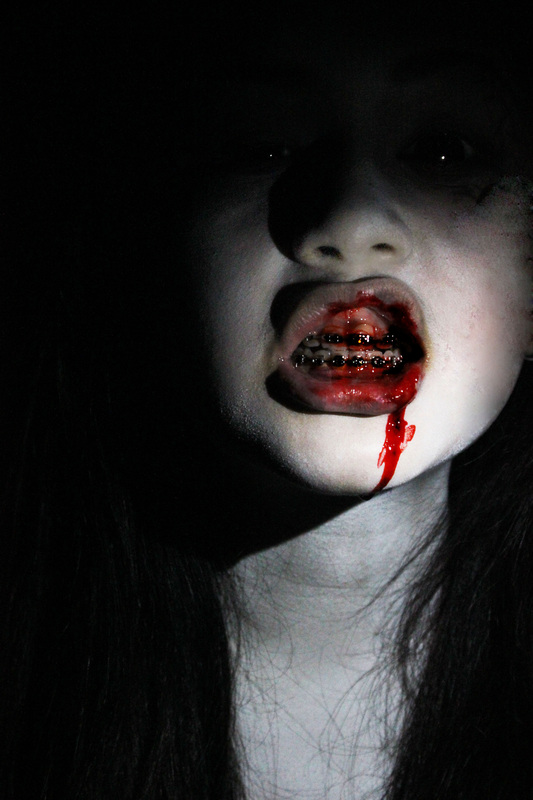
This photograph didn't need much manipulation however, I felt that the scars on her face looked very distracting so I used the patch tool to remove it. I enhanced it to make it brighter using the brightness and contrast tool. My intentions were to make her mouth the focal point again as I did with the previous one. This photograph slowly fades the rest of the models face out and this is why I find it effective as I feel that the lighting has helped to make this the focal point. I added fake blood in to the models teeth with the braces to make the photograph more gruesome and eerie. I used rule of thirds for the composition of this face to make it look more effective.
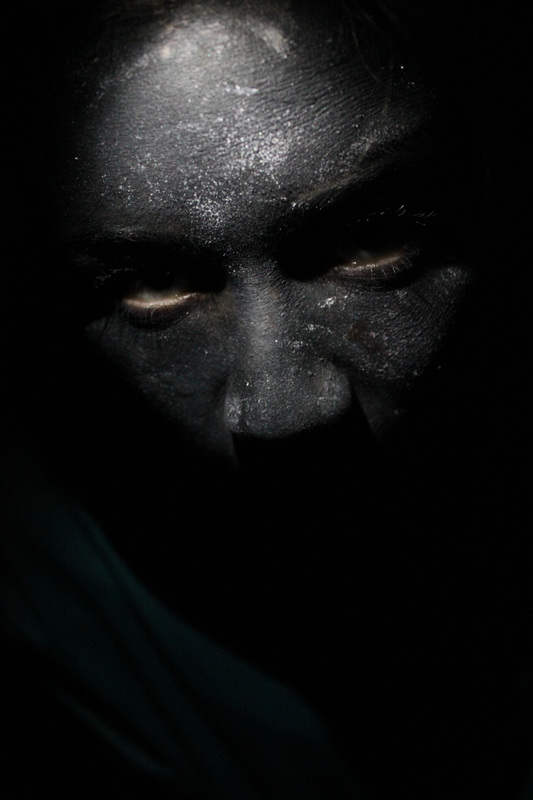
For this photoshoot, My intentions were to portray something different from the previous shoots but to keep the same concept of making the images look eerie and horrific. As I had used a white mask on my model on the previous shoots, I changed this by applying black paint all over the face. I then applied paint to my models teeth and blood to make it stand out when she opens her mouth as I wanted to create a contrast. I used chiaroscuro lighting to make it look more effective and then different lighting within this such as butterfly lighting and split lighting. I also used a lighting which I placed at the bottom to make the shadow look extremely unflattering and create extreme shadows on the face. At first, I believed that the black paint wouldn't look as effective against the black background but fortunately, it looked more effective and it stood out. I am pleased with this photoshoot as I like the texture that is shown and the depth of each photograph.
|

|
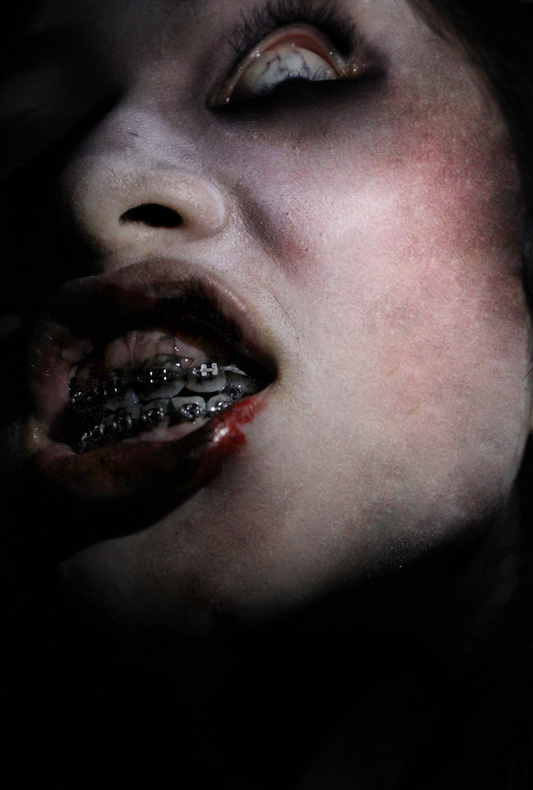
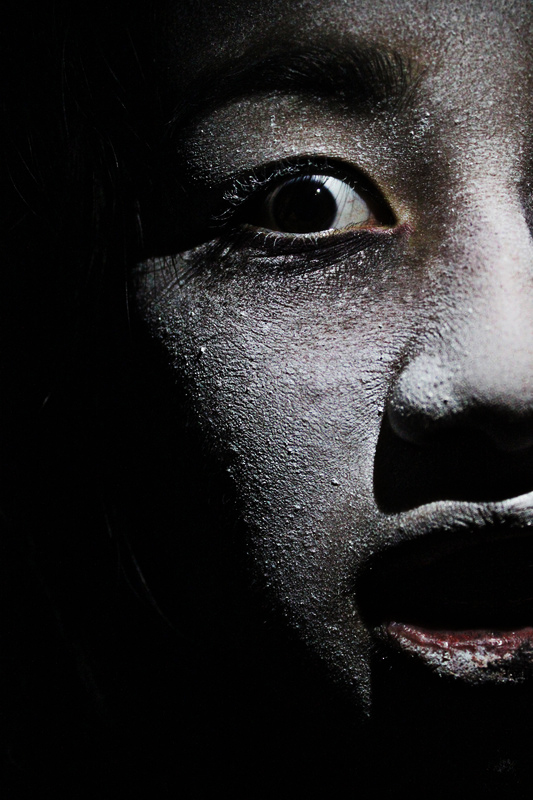
On photoshop, I duplicated the layer and then went to filter, others and high pass. This created a textured photograph however it was covered in a grey overlay. I then used the setting to merge both layers using hard light and this created the texture and made it look more bold. I believe that this photograph puts more emphasis on her face, making it look more realistic.
|
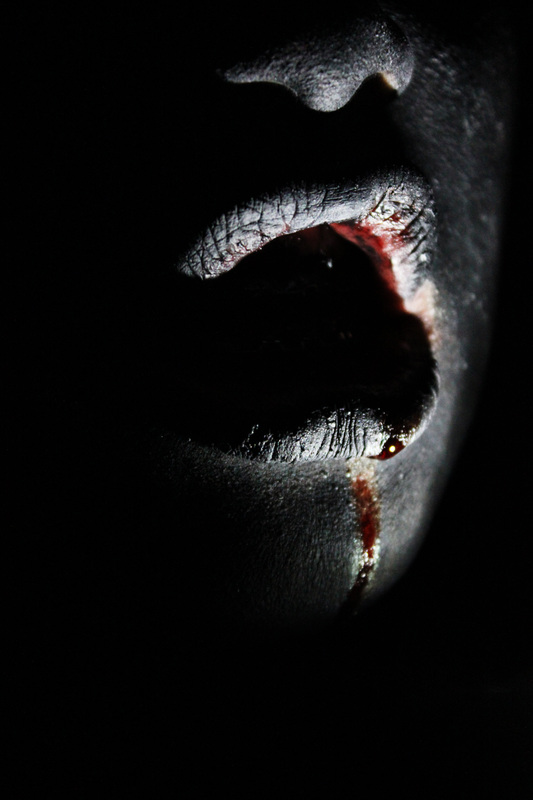
I like this photograph as it looks very textured and in depth, the shadows created cover the majority of the photograph however, the sections that you can see show depth of field. This look effective as her lips are the focal point and this is the most textured section.
|
|
I photo-shopped this photograph to give it more depth. I like this photograph as is fades in to the darkness. I took a photograph of her lips to show the texture between the lips and skin. The blood on her lips look real and this makes it look more eerie. This lighting style looks effective as it creates a mysterious atmosphere.
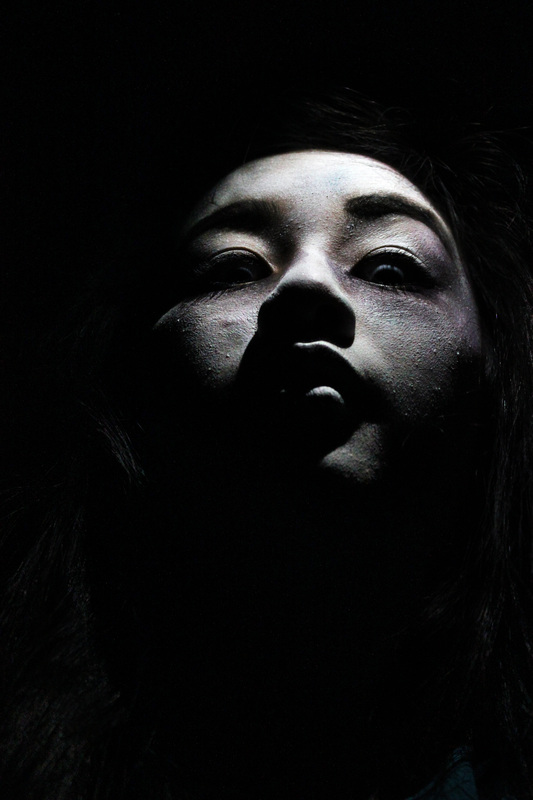
In this photo-shoot, I used paint on my models face as I wanted to give her face more texture because in the previous shoots, I had used powder and the texture of powder was smooth. I also changed the make-up as I didn't want any distracting marks on her face therefore, I ensured that I gave her a plain white face and with black marks underneath her eyes for more depth. I used chiaroscuro lighting as this lighting is the most effective. I like the way only parts of her face are being seen and the rest is hidden within the darkness. One aspect that I can improve on is possibly giving her face more texture and and depth to it.
She Wakes
She Stares
She Cries
She Unleashes
She Dies